March 30th, 2010

How to Buy Prime Steak: A Guide to Steak Cuts, Grades & Aging

Tips and thoughts from a wonderful chef friend of mine . . . he knows what he’s talking about!
How to Buy Prime SteakYou cannot help but to look at two different steaks in the store and wonder why one is 3 times as expensive as the other. Often times we tend to accept a lower quality steak just so it doesn’t hit our wallets so bad. However, there are some good tips to help you pick the best steak regardless of the price points.

You have lots of options as a steak lover, each with their own pros and cons.  The first hurdle we are going to look at, because, honestly, it is the problem we usually confront with all of our decisions – price.

Cuts Make a Difference

Lots of factors affect how much a steak costs, like the cut of meat, the type of feed the animal ate and even the breed of the cow itself.  The cuts break down from most to least expensive in this way:  filet mignon, ribeye, strip and sirloin.

parts of a cow

There are lots of other cuts but we won’t worry about those since they don’t really fall into the “steak” category most of us traditionally think of.  Each of these cuts come from a particular muscle in the animal, the filet from the tenderloin (which runs through the hindquarter of the animal and through the short loin and sirloin cuts), the ribeye from the rib section and the strip from the short loin.  The Porterhouse and T-bone come from here as well but we will cover those later.  And finally, the sirloin from the sirloin.

These selections all make ideal steak choices for one important reason – tenderness.  Muscles that get used more frequently tend to be tough.  That is why you don’t often see steaks from the round (rear leg) section thrown on the grill.  They taste great, but you will be chewing for a long time.  In order of tenderness the steaks above go as follows, filet mignon (from the tenderloin, tender-loin, get it?) ribeye, strip and sirloin.

This follows our price list above.  There is a direct correlation between how tender a steak is and how much it costs.  Other cuts you might see in the store are flank, plate, chuck or round steaks.  But these will all be very tough if cooked in the traditional “steak” methods.

Another thing to keep in mind is that muscles that are used more frequently, and are therefore tougher, also happen to have a more robust flavor.  This has to do with more blood circulation through the muscle while the animal is alive.  Chuck, or shoulder as it would be called to those of us non-butchers, can be extremely tough.  But it is a beefier tasting beef.

So back to our steaks.  There is nothing that compares to the soft, velvety mouth-feel of a filet, but more than a few steak enthusiasts lament its subtle beef flavor and prefer a ribeye or strip because it offers more of that classic beef taste.  Sirloin at the bottom end of the toughness scale (and still quite tender, really) has the best flavor of the steaks.  Ribeye and strip tend to give you the best balance in terms of cost, flavor and tenderness.

USDA Grading – What is It?

So now you know where the steaks come from, but what about all those words advertisers stick to them like Angus or Prime?  All meat is inspected by the USDA for wholesomeness.  This means if it is sold, it is legally fit for human consumption.  Unfortunately, that is a pretty low bar, so the USDA has a grading system.

Grading is a voluntary system that beef producers allow their meats to be graded on in several categories.  The long and short of it is a delicate balance of fat to lean meat, plus the age of the animal.

The younger the animal and the higher the fat marbling of the meat, the higher (and therefore more expensive) the grade.  The only grades you want to consider, (even though there are eight of them, the bottom few named “canner” and “cull” – yum, right?) are prime, choice and select.

USDA Prime Steak
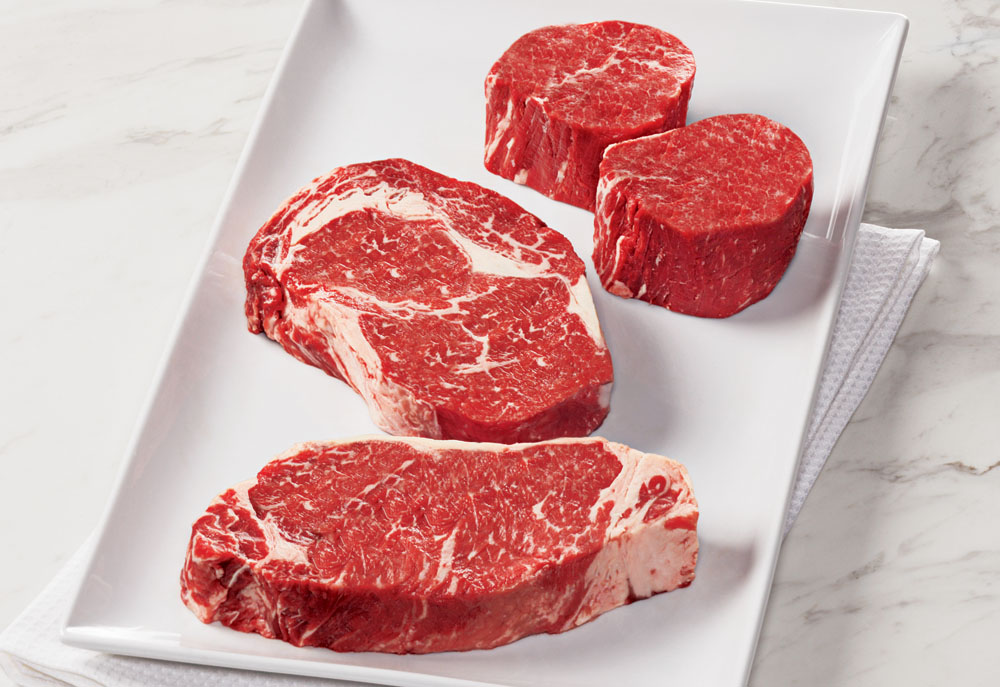
Prime Filets
Prime can be very expensive and has beautiful fat marbling in a very tender steak. Steak image courtesy of KansasCitySteaks.com


USDA Choice Steak
Choice Steaks
Choice offers a great value of marbling and tenderness at a fair price.


USDA Select Steak

Select Steak
Select has much less marbling. (Used by permission of USDA.gov)

But, remember, you only want to go with the most tender cuts.  Don’t be taken in by names like Angus or Wagyu.  They typically mean much higher prices.  Certain breeders of cattle specialize in one breed, like Angus, Black Angus or the ridiculously expensive Wagyu (this is a breed of cow from Kobe, Japan, where the animals have beer with their breakfast and at a minimum one hour of massage a day.  It can also cost well over $100 per lb.).  These breeder associations have created their own system to market their cows with their own standards, not the USDA’s.  Because of that, they can charge a pretty penny.

Dry Aging or Wet Aging?

Another component to look for is aging.  I’m gonna get a little technical and gross here (and I mean very little technical).  When an animal is butchered the muscles go through rigor mortis where it becomes tough, and over time the muscles soften.  This freshly butchered meat is called green meat.  You don’t want that.  It’s not actually green by the way, the term green refers to age, not color.

Green meat is tough and chewy.  The muscles need to relax before you try cooking them.  A reputable supplier only sells meat that has been aged properly.  There are two ways to age:  dry and wet.

Dry aging is expensive and very difficult to find.  The meat is hung in a temperature and humidity controlled environment and allowed to rest for a set period of time.  Eleven days or so has proven to be the magic number here where tenderness no longer increases.  One of the reasons dry aging is so expensive is that you have considerable moisture loss and therefore a higher cost per pound.

Wet aging occurs when meat is packed into vacuum-sealed packaging and allowed to rest in its own liquid (sounds worse than it is).  Many consumers prefer wet aging because dry aging sometimes imparts a musty, basementy aroma.

Where Can I Buy Quality Steaks?

So now you know what cut to look for and what grade you want.  So where do you go?  You should look for a butcher like you do a mechanic.  A good one is hard to find.  Once you find one, ask questions like, “Where do they get their beef from?” “Is it grain fed?” “How is their meat aged?”

A good butcher will answer all of these questions.  Shop around and go to Web sites for information.  There is plenty out there.

Hopefully this gives you some food for thought!


March 20th, 2010

Steak Recipe: Rocco’s Pepper Steak

Wanna be like the Biggest Loser?

You know, that show on NBC?

I do. Those folks are focused, driven and they know their stuff.

That’s partly because they have the help of some very talented trainers . . . and chefs.

That’s where we come in. Chef Rocco DiSpirito created this amazing pepper steak as a healthy, tasty meal for Season 5’s Biggest Loser contestants.

Hey, if it’s good enough for them, it’s perfect for me.

See what YOU think!

Rocco’s Pepper Steak

Serves 4

3 -1/2 cups Free-Range Chicken Broth, low sodium
fresh ground pepper and NuSalt
1 cup short-grain brown rice
1 tablespoon extra virgin olive oil
12 Anaheim peppers
Pam spray
4 5-ounce portions lean beef tenderloin
1 vidalia onion, slice thinly
5 cloves chopped garlic
3 tablespoons balsamic vinegar
3 tablespoons cornstarch
1/2 cup Trader Joe’s Fat Free Salt-Free Marinara
1/2 cup Evaporated Fat Free Milk
1/2 cup chopped fines herbs (parsley, chives, tarragon and chervil)
pinch cayenne

DIRECTIONS

1. Bring 2 cups chicken broth to a boil in a medium saucepot. Season with NuSalt and add rice. Cover, turn down heat to a very low simmer and cook for about 1 hour or until rice is tender and liquid is absorbed. Fuff rice with fork and toss with olive oil. Keep warm.

2. Char Anaheim peppers over an open flame, turning to cook evenly, until skins are mostly burnt. Place peppers in a bowl and cover with plastic wrap for about 7 minutes to steam off skin. Remove as much charred skin as possible with a paper towel. Seed peppers and cut into rings about 1/2 inch thick.

3. Heat a large sauté pan over medium-high heat. Season steaks with pepper and NuSalt and spray pan with Pam. Sauté until golden brown, about 4 minutes per side. Remove steaks from pan and keep warm.

4. Spray pan with Pam again and add onions. Sauté until onions are starting to become tender, about 5 minutes. Add garlic and sauté for another minute. Deglaze with balsamic vinegar. Add 1 cup chicken stock to the pan and bring to a simmer. Mix remaining 1/2 cup chicken stock with cornstarch to make a slurry and whisk into pan. Stir in marinara and evaporated milk and bring to a simmer. Add peppers, cayenne and simmer until vegetables are tender. Return beef to the pan to reheat, for about 2 minutes. Stir in fines herbs. Serve with rice.

Recipe and logo courtesy of NBC.com.


February 16th, 2010

Top 10 Steak Grilling Tips

Top 10 Steak Grilling Tips (From a Real-Live Chef!)

If you think grilling a steak is as simple as slapping a piece of meat you bought at the supermarket on a grill and flipping it a few times, you’re missing out on what could be THE GREATEST STEAK OF YOUR LIFE.

Here are some grilling tips from an honest-to-goodness chef that’ll make your next steak meal your finest work ever.

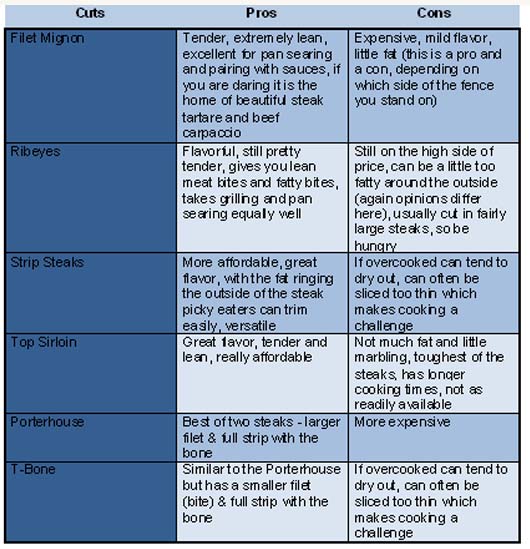
1. Choose the right cut of meat — Some cuts of meat are better for grilling than others. I, personally, prefer to grill strip steaks over other cuts because you get a nice combination of fat and meat for a great flavor. Filet mignon, on the other hand, I prefer to pan sear because it is so lean and I can add fat and flavors in the pan.  Experiment!  Ultimately, no one can tell you what you like, you have to find it for yourself.  Here are the pros and cons of each cut:

cuts of steak

2. Choose the right quality of meat — Nothing ruins a good steak dinner like a bad steak. A lot of places sell poor quality meat, so make sure you choose a reputable supplier so you know you are getting your money’s worth.  I always find premium quality steaks online.  By law, all meats are inspected for wholesomeness so no one is selling you meat that will kill you, but grading is a voluntary system.  Meats are graded on several categories, including the marbling of fat and the amount of connective tissue.  Sure, it may be fit to eat but do you want to eat it?  Prime is the highest quality, followed by choice and select.  Choice meats are very high quality steaks and the most common steak used in the restaurant industry. Here are a few pointers to track down the perfect quality & cut of steak:

  • Get to know your butcher, call and ask when they receive orders
  • Special order cuts you know you want
  • Ask them to cut meat just for you (you’d be surprised what they will do for you)
  • Order just the grade that you want
  • Ask how long they keep their steaks if they don’t sell them

USDA Prime Steaks

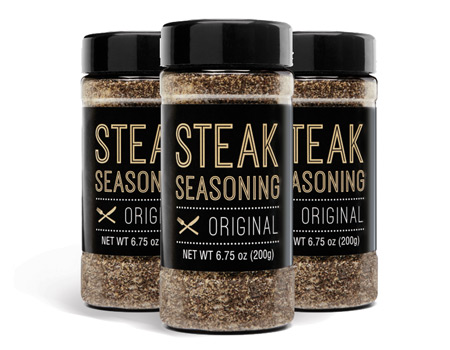
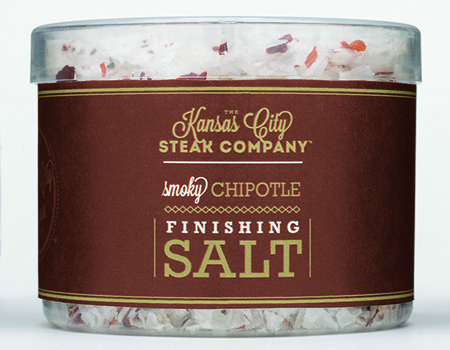
3. Season early — You should salt your meat even before you start your coals. If you throw salt on right before you put it on the grill you end up leaving salt all over the grill, not on your steak. So season your steaks about fifteen minutes before you put them on the grill. That gives the salt a chance to dissolve and evenly flavor your meat.  Sea salt is all the rage now and chefs like to fancy up a plate by using specialty salts like Hawaiian Pink Salt or Fleur de Sel. Sometimes a little good salt is all that a steak needs.

Steak Seasoning

4. Take ‘em out early — Let your steaks sit on the counter for at least twenty minutes. I know it doesn’t seem sanitary, but since steaks are whole muscles and you are cooking the outside well above safe levels, you won’t need to worry so much about food-borne illness. The problem with throwing your steaks on the grill right out of the refrigerator is that it will take them a lot longer to cook. Steaks at room temperature take seasoning better and will cook faster. Unfortunately, meat takes time to cook and if you are in too much of a hurry to cook it you are probably in too much of a hurry to really enjoy it.  Take your time and learn to enjoy cooking your steak almost as much as eating it.

5. Use charcoal — Gas grills work great for cooking food but can sometimes impart a gas flavor to your meat. I like to use natural hardwood charcoal started in a chimney. Don’t use lighter fluid; it defeats the purpose of using hardwood charcoal.  You want to smell the steak roasting over the coals – that is the best part! Some people swear by mesquite soaked in apple juice others say you cook your steak too fast to get any benefit.  Wood chips can add flavor if you are smoking your meat but that usually takes a lot more time than it takes to grill a steak.  My recommendation is that if you are curious, play around see if you can taste and enjoy the difference.

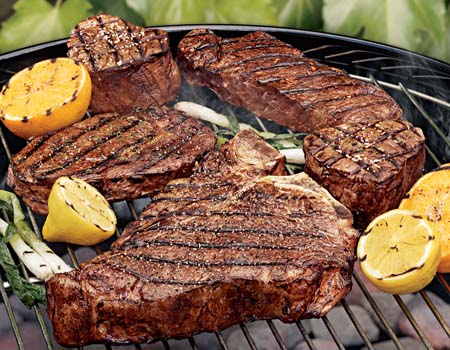
Steaks on Grill

6. Hot coals — Set your coals up so that you have zones of cooking. Always start off on a hot spot. You want good color and flavor from the high heat. When you flip it, don’t put it down on the same spot as before — it will be cooler. Find another hot spot to continue getting good color and flavor.

7. Don’t touch it! — This is one of the biggest mistakes a home cook makes. Everyone wants to keep checking the food to see if it is done. Leave it alone. Know how thick your steak is and roughly how long it takes to cook. Flip it once and give it a quarter turn once on each side. The more you touch it the better chance you have of screwing it up. Check out this grilling chart as a guide on how to cook steaks:

steak grilling tips chart

Grilling Chart courtesy of www.kansascitysteaks.com

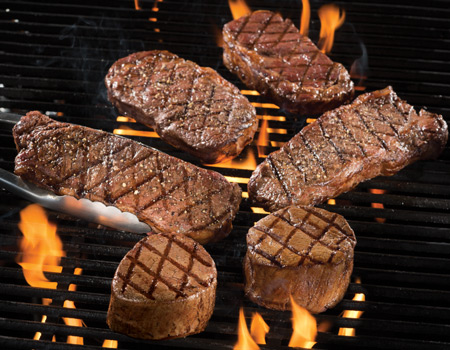
8. Make it pretty — Use the hot grill to create “cross-hatch” grill marks. Set your steak down at a 45-degree angle from your grill lines. About a quarter of the way through cooking, give it a quarter turn. Half-way through cooking, flip it once. Give it a final quarter turn for the last bit of cooking. When finished you should have a steak that looks like it belongs on a commercial. This might not be the most important thing in your day, but if you’re on a first date or trying to impress then try this!

Steaks on Grill

9. Leave it alone — There’s nothing worse than taking a beautiful steak and covering it with other flavors. Sauces, rubs and butters are fine but if I’m going to eat a steak I like to taste steak. If you are using a lesser cut of meat or poorer quality, marinades are a great tool. But we are talking steak here and all it needs is a little salt, pepper and some heat to cook over.  So refer to rule #2 and source and buy only good quality meat.

Finishing Salt

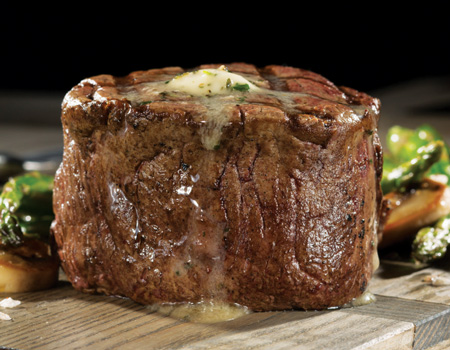
10. Make all your condiments early — One trap many people fall into when they grill meat is trying to cook the rest of the meal at the same time. Your kitchen is inside; your grill (if you are following tip #5) should be outside. Don’t try to run between the two. You will only end up ruining your steak or your side dish — or both. Plan your meal to get your extras done early so you can focus solely on your grilling. I mean, it deserves it, doesn’t it? I like a simple compound butter made of softened, unsalted butter, garlic, a little red wine and some cracked pepper. Mix it all together, (in a mixer, if you can, so it is smooth), roll it in plastic wrap and put it in the fridge up to two weeks before you cook your steak. One pat on top of each steak can be a nice treat.

Filet with Finishing Butter


Archives